
🌞 A Summer Story from My Kitchen
Every season has its rhythm, and summer’s is my favorite. It’s the sound of garden shears clipping herbs, zucchini vines growing wild, and cherry tomatoes ripening faster than I can use them. In my kitchen, summer means light meals, fresh flavors, and recipes that don’t require hours on the stove—because let’s be honest, no one wants to sweat over dinner when the sun’s still blazing at 6 p.m.
That’s why I always find myself returning to this Easy Summer Frittata with Garden Veggies. It’s more than a recipe—it’s a mood. It’s the kind of dish I make when I want something that feels special but takes almost no effort. Whether it’s brunch with friends, a solo lunch on the patio, or a light dinner with chilled wine, this frittata never fails to deliver.
And because you’re here at Olivia Flavors, you already know—I’m all about food that’s approachable, seasonal, and full of joy. This recipe is exactly that.
🧡 Why Frittata? Why Summer?
A frittata is one of those perfect foods. It’s like an omelet that forgot to be fussy. It’s thicker, heartier, and more forgiving—great for beginner cooks, but still elegant enough to impress.
What I love most is how flexible it is. You can serve it hot or cold, make it for breakfast or dinner, and fill it with almost anything. In the summer, I go straight to the garden or local market. Zucchini, tomatoes, sweet peppers—they’re at their peak, and their natural flavors need almost nothing else.
Plus, this dish is:
- 🥗 Naturally gluten-free
- ⏱️ Ready in under 30 minutes
- 🍳 Cooked in one skillet
- 🌿 Easily adaptable year-round
🇮🇹 Frittata: A Taste of Italian Simplicity
In Italy, frittata is comfort food. It’s also practical. Leftover pasta? Add it. Roasted vegetables? Toss them in. A few sad herbs at the back of the fridge? Perfect. It’s a way to turn “a little of this and that” into something that feels like a meal.
When I visited family in Umbria, my aunt would serve her frittata cold with a salad and a hunk of crusty bread. It was pure magic—humble, flavorful, and made with love. That’s the spirit I bring to this version: no stress, just sunshine and flavor.
🛒 What You’ll Need (Olivia’s Summer Version)
🥬 Veggies
- 1/2 zucchini, diced small
- 1/2 red bell pepper, chopped
- 1/4 cup red onion, finely diced
- 1/2 cup cherry tomatoes, halved
🍳 Eggs & Dairy
- 6 large eggs
- 1/4 cup whole milk (or plant milk)
- 1/4 cup crumbled feta or shredded mozzarella
- Salt & pepper, to taste
🌿 Extras
- 1 tbsp olive oil
- Fresh basil or parsley, for garnish
- Optional: red chili flakes, garlic powder
🧂 Ingredient Tips from Olivia
- Zucchini: Keep the skin on for color and texture. Pat dry after dicing to avoid sogginess.
- Tomatoes: I use cherry tomatoes for sweetness and fewer seeds.
- Cheese: Feta adds tang, mozzarella brings that gooey melt. Use what you love.
- Milk: A splash of milk makes the eggs tender. For extra richness, use cream.
🔪 Kitchen Tools
- 10” oven-safe skillet (cast iron is best)
- Medium mixing bowl
- Whisk or fork
- Spatula
- Knife and board
👩🍳 Let’s Cook – Part 1 Steps
Step 1: Preheat and Chop
Start by preheating your oven to 375°F (190°C). Meanwhile, chop your zucchini, pepper, and onion. Halve your cherry tomatoes. Try to keep everything bite-sized and consistent.
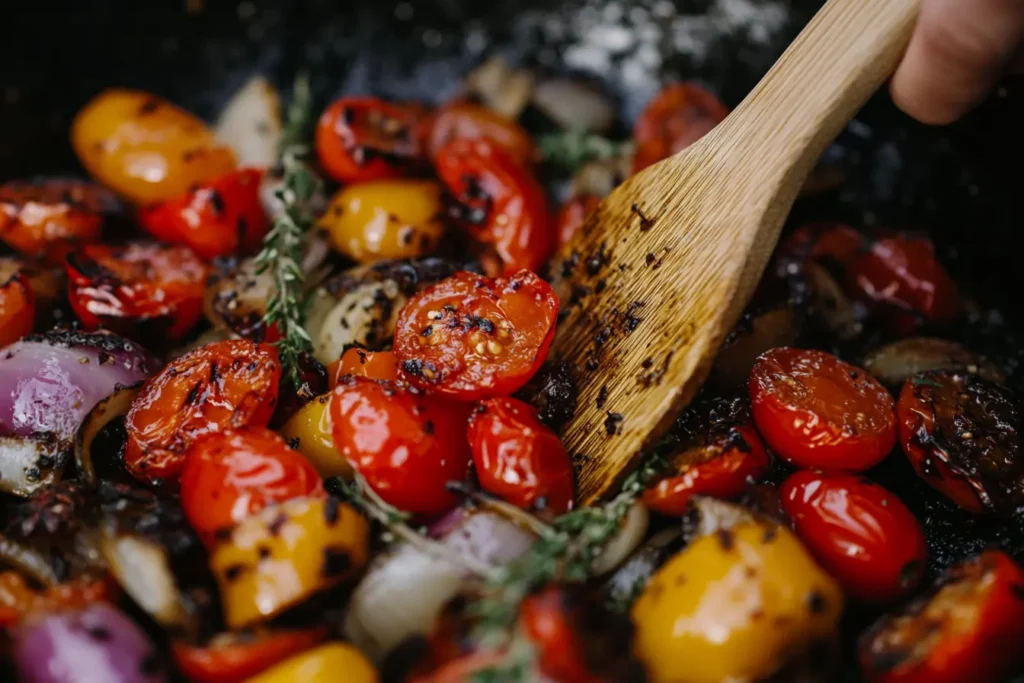
Step 2: Sauté the Vegetables
Heat olive oil in your skillet over medium. Add the onion and cook for about 2 minutes. Then stir in the zucchini and bell pepper, and sauté for another 4–5 minutes until tender but still vibrant. Lastly, add your cherry tomatoes and cook for 1 minute—just enough to soften them slightly.
Olivia’s tip: If you love garlic, add a pinch of garlic powder or a minced clove right before the tomatoes go in.
Step 3: Whisk the Eggs
While your veggies cook, whisk the eggs, milk, salt, and pepper in a bowl. You want a well-combined, frothy mixture. The more you whisk, the fluffier your frittata will be.
🌿 Optional Flavor Boosters
Want to get fancy? Stir these into your eggs before pouring:
- 1 tsp pesto for a herbaceous twist
- Grated Parmesan for umami depth
- Chopped fresh dill or chives for brunch vibes
- A pinch of chili flakes for gentle heat
🧁 Why This Works for Meal Prep
This frittata is a total win if you’re the kind of cook (like me!) who likes to prep once and eat well all week. It’s easy to:
- Slice into wedges for grab-and-go breakfasts
- Serve cold over salad for lunch
- Reheat for a quick dinner with roasted veggies
It even freezes beautifully in individual portions. Just wrap slices in parchment, tuck them in a freezer bag, and warm in the oven or microwave when needed.
🍴 Coming up in Part Two:
In Part Two, we’ll pour the eggs, bake the frittata, and go deep into serving ideas, seasonal variations, leftover transformations, and final thoughts from my kitchen to yours.
🧑🍳 Step 4: Pour the Eggs and Bake
Now that your vegetables are sautéed and your egg mixture is ready, it’s time to bring the whole thing together.
Lower the heat on your skillet slightly. Give the pan a gentle shake to distribute the vegetables evenly, then pour your egg mixture right over the top. Use a spatula to move things around just slightly—this helps the eggs settle into all the little spaces.
Sprinkle your cheese evenly over the top. I like to leave little pockets where it can melt into golden, savory bites.
Let It Set (a Little)
Before you even pop it in the oven, let the frittata sit on the stovetop for 1–2 minutes. This helps the bottom start to firm up and gives it that nice, golden crust.
Then, transfer the skillet to your preheated oven and bake at 375°F (190°C) for 10–12 minutes. You’ll know it’s done when the edges are golden and the center is set with just the slightest wobble.
Olivia’s Tip: Want that beautiful golden top? Switch to broil for the last 1–2 minutes—but watch it closely. A minute too long and it can brown too fast!
🌿 Step 5: Rest and Slice
This is the step most people skip—but not us! Let your frittata rest on the stovetop for at least 5 minutes. Not only does it slice cleaner, but the flavors also get a chance to settle and deepen.
Once it’s cooled slightly, slice into 4 generous wedges or 6 smaller portions.
🥗 Serving Ideas from My Table
This dish is as versatile as they come, and how you serve it depends on your vibe.
🍽️ For Brunch:
- Arugula salad with lemon vinaigrette
- Fresh fruit slices (peach, melon, or berries)
- Toasted sourdough or garlic crostini
- Iced coffee or lavender lemonade
🍷 For a Light Dinner:
- Herby roasted potatoes
- A crisp glass of Pinot Grigio or rosé
- Charred asparagus or grilled zucchini
- Olive tapenade and crusty bread
🧺 For Picnics:
Frittata is amazing cold! Wrap slices in parchment, add a mason jar salad, and you’re good to go.
🍳 How to Store, Freeze, and Reheat
This frittata isn’t just beautiful on day one—it’s a lifesaver all week.
Fridge:
- Store slices in an airtight container for up to 4 days
Freezer:
- Wrap each slice in parchment, then foil, and store in a freezer bag
- Keeps well for 2 months
Reheating:
- Microwave: 45 seconds (cover with paper towel)
- Oven: 300°F for 8–10 minutes
🍂 Seasonal Variations for Year-Round Frittata Love
I make this recipe all year long—just switch up the veggies and cheese.
🌸 Spring
- Asparagus, peas, goat cheese, and mint
- Serve with lemon-dressed greens
🍁 Fall
- Roasted butternut squash, kale, and gruyère
- Add a pinch of nutmeg or cinnamon
❄️ Winter
- Mushrooms, caramelized onion, and cheddar
- Finish with chopped thyme or rosemary
🌞 Summer (this version!)
- Zucchini, cherry tomatoes, bell pepper, feta
- Garnish with fresh basil
Cooking with the seasons not only tastes better—it’s cheaper, healthier, and more sustainable. 🌍
🧠 How to Elevate the Flavor Even More
Want to give your frittata a gourmet twist? Try one of these additions:
- Herbed ricotta dollops on top before baking
- Roasted garlic paste whisked into the eggs
- Chili oil drizzle after baking for a spicy kick
- Crispy breadcrumbs for a golden topping
You don’t need to complicate it—just one small upgrade can make it feel totally new.
🥪 Leftover Ideas: Reinvent It
I never let frittata go to waste. If I have a slice or two left, here’s how I transform it:
1. Frittata Breakfast Sandwich
Warm it up and layer between toasted bread with arugula and aioli.
2. Frittata Wrap
Slice thin and wrap in a tortilla with hummus, greens, and roasted red peppers.
3. Frittata Croutons
Dice it and crisp in a skillet—then toss over soup or salad for a savory twist.
📸 Presentation Tips: Make It Olivia Flavors-Ready
If you’re serving this at a brunch or just want to treat yourself, here’s how to plate it beautifully:
- Serve each slice slightly angled on a white or wooden plate
- Add a small mixed herb salad right on top
- Finish with a drizzle of olive oil, extra feta crumbles, and flaky sea salt

It’s all about that “effortless but elegant” look. Bonus: It photographs like a dream. (Tag me if you share it—@olivia.flavors!) 📷
💛 Final Thoughts From My Kitchen
This frittata isn’t just a recipe. It’s a rhythm. A way of cooking that celebrates what’s fresh, what’s simple, and what makes you feel grounded.
For me, it’s summer on a plate: light but satisfying, rustic but pretty, and always full of flavor.
At Olivia Flavors, I believe that great food doesn’t have to be complicated—it just needs to be made with intention. This recipe lets the ingredients do the work and leaves you with something that feels like comfort… without the heaviness.
So whether you’re cooking for two, feeding a house full of friends, or just giving yourself the gift of a beautiful homemade meal—this dish is for you.