Introduction
How to Make a Cake Look Like a Cloud? Ever wondered how to make your cake look like a soft, fluffy cloud? Whether it’s for a birthday party or a cozy afternoon treat, the cloud cake trend has taken baking to new heights—literally and visually! This guide walks you through every step, from mixing the ingredients for a pillowy cake base to decorating it with dreamy, whipped frosting that looks as soft as air. Plus, you’ll discover pro tips to ensure your cake doesn’t fall flat. Let’s make that “cake of your dreams” a reality!
Understanding the Cloud Cake Aesthetic
What is a Cloud Cake?
A cloud cake is more than just a dessert—it’s a visual delight that resembles a soft, billowy sky full of puffy clouds. Characterized by its airy structure and smooth, white frosting swirls, this cake embodies elegance and simplicity in every bite.
Why is the Cloud Cake Trend Popular?
Well, who doesn’t love the dreamy aesthetic of fluffy desserts? The combination of ethereal looks and melt-in-your-mouth textures has captivated both home bakers and professional pâtissiers. Plus, with social media abuzz with whimsical designs, cloud cakes have become an iconic centerpiece for modern celebrations.
Design Elements for a Cloud-like Appearance
Creating a cake that looks like a cloud involves using soft, billowy frosting with subtle curves and peaks. The frosting—whether it’s whipped cream or meringue—creates soft contours that mimic the appearance of clouds.
To elevate the visual appeal, bakers often use:
- Edible glitter for a “sky sparkle” effect
- Small meringue puffs as miniature clouds
- Pastel food coloring to resemble a dreamy sunset sky
For a pro touch, sprinkle some edible pearls or sugar dust for that magical finish!
Ingredients and Supplies Needed
A perfect cloud cake starts with the right ingredients and tools. Don’t worry—you likely have most of these essentials in your pantry already! Here’s what you’ll need to get started:
Essential Ingredients for the Cake Base
For a soft and airy cake that holds its structure, we’ll use ingredients that enhance fluffiness without making the cake too dense.
- 2 ½ cups all-purpose flour (for structure)
- 1 ¾ cups granulated sugar (adds sweetness and moisture)
- 1 tbsp baking powder (for a light, airy rise)
- ½ tsp salt (balances the sweetness)
- 1 cup whole milk (room temperature, for a tender crumb)
- ½ cup unsalted butter (softened, for richness)
- 4 large egg whites (for a light, cloud-like texture)
- 1 tsp vanilla extract (adds depth of flavor)
Frosting and Cloud Decorations
The frosting is the star of the show! You’ll want it to be light but firm enough to hold those gorgeous peaks.
- 2 cups heavy whipping cream (cold)
- ½ cup powdered sugar (for sweetness and stability)
- ½ tsp cream of tartar (optional, for firmer peaks)
- Edible decorations: white meringue puffs, sugar pearls, or edible glitter
Recommended Tools and Equipment
To get the dreamy cloud-like swirls just right, having the right tools makes a world of difference:
- Electric mixer or hand mixer (for whipping the batter and frosting)
- Offset spatula (for smooth frosting application)
- Piping bag with a star or round tip (for creating cloud-like peaks)
- 8-inch round cake pans (for evenly baked layers)
- Cooling rack (to let the layers cool evenly)
With your ingredients and tools prepped, you’re ready to start building the perfect cake base! Let’s make sure your batter is as airy as the frosting that follows.
Preparing the Perfect Cloud Cake Base
Now that you have your ingredients and tools ready, it’s time to prepare the cake base! The key to making your cake soft and airy is to handle the batter gently and avoid overmixing. Let’s dive into the step-by-step process to get that dreamy, cloud-like texture.
Mixing the Ingredients for a Light, Fluffy Texture
- Preheat the oven: Set your oven to 350°F (175°C) and grease two 8-inch round cake pans. You can also line the bottoms with parchment paper for easy release.
- Sift the dry ingredients: In a large bowl, sift together the flour, baking powder, and salt. Sifting aerates the flour and prevents lumps in the batter.
- Cream the butter and sugar: In a separate bowl, beat the softened butter and sugar on medium speed until light and fluffy (about 2-3 minutes). The mixture should appear pale in color.
- Add the egg whites: Gradually mix in the egg whites one at a time. This step helps create a stable, airy batter.
- Incorporate the dry and wet ingredients: Alternately add the dry ingredients and milk to the butter mixture, starting and ending with the dry ingredients. Mix on low speed until just combined to avoid overworking the batter.
- Stir in the vanilla extract: Gently fold in the vanilla to enhance the flavor.
Baking Tips for Even Rising
- Fill the pans evenly: Divide the batter equally between the cake pans to ensure even layers.
- Tap out the air bubbles: Lightly tap the filled pans on the counter a few times to release any trapped air bubbles.
- Bake to perfection: Place the pans in the oven and bake for 25–30 minutes, or until a toothpick inserted into the center comes out clean.
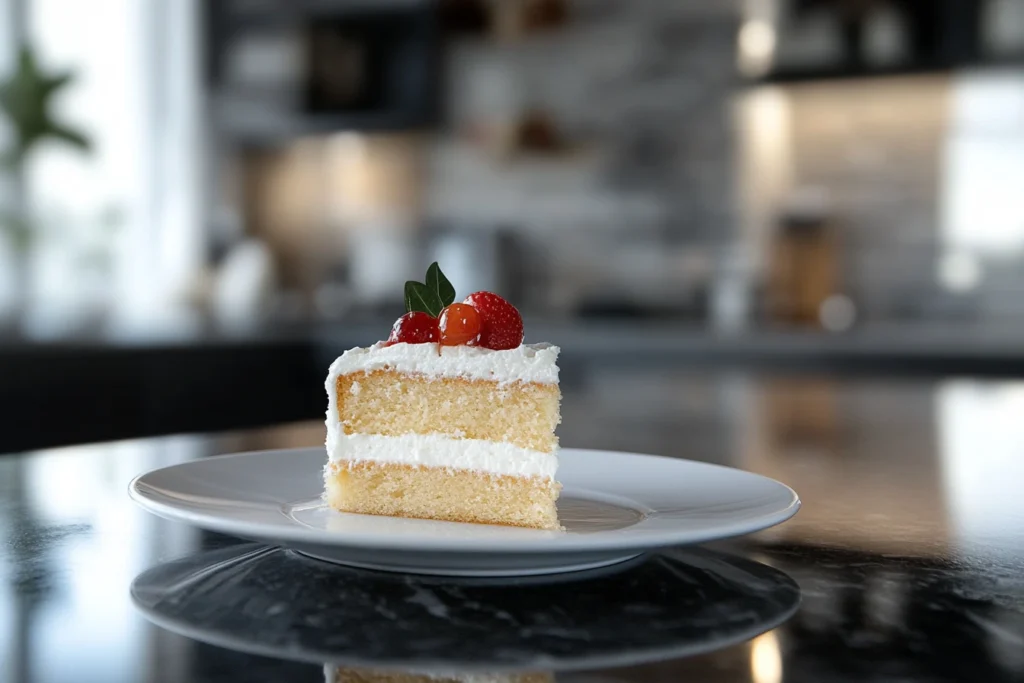
Cooling and Layering the Cake
- Cool in the pans: Let the cakes cool in their pans for 10 minutes. This helps them set without collapsing.
- Transfer to a cooling rack: After 10 minutes, carefully invert the cakes onto a cooling rack and let them cool completely before frosting.
- Level the layers (optional): If the tops of your cakes are domed, use a serrated knife to gently level them out for even stacking.
Your fluffy, cloud-like cake base is now ready! In the next part, we’ll make the frosting that will turn your cake into a dreamy masterpiece.
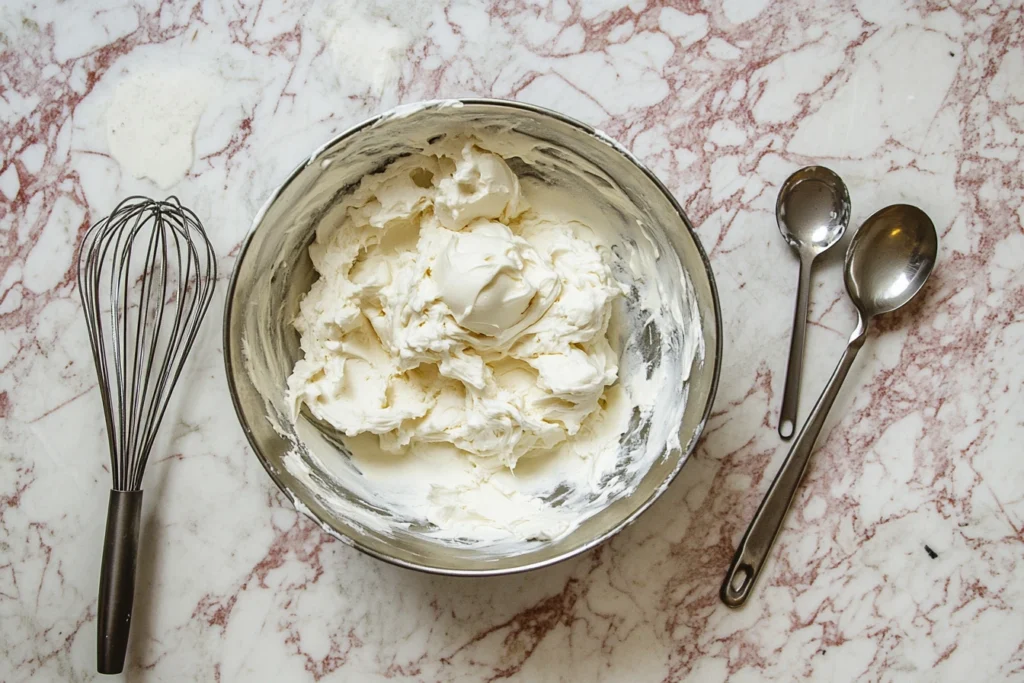
Making the Cloud-like Frosting
The frosting is where the magic happens! A perfectly whipped frosting will give your cake its signature cloud-like appearance. The key here is to achieve soft yet stable peaks that hold their shape while looking irresistibly fluffy. Let’s break it down step-by-step.
Choosing the Right Frosting Base (Whipped Cream, Buttercream, etc.)
For this recipe, we’re using whipped cream frosting because it’s light, airy, and smooth—ideal for that dreamy finish. However, if you prefer something more stable, you can substitute with Swiss meringue buttercream or stabilized whipped cream.
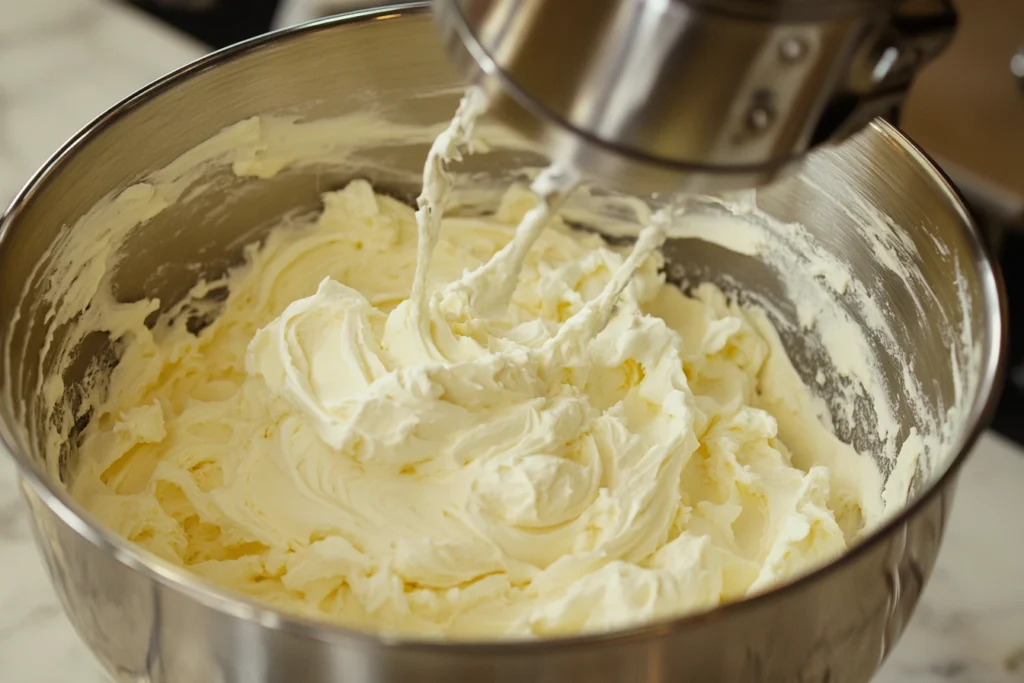
Achieving the Perfect Soft Peaks
- Chill your mixing tools: Place your mixing bowl and beaters in the fridge for 15 minutes before you begin. Cold tools help the cream whip faster and stay firmer longer.
- Combine ingredients: Pour the heavy cream into the chilled bowl. Add the powdered sugar and cream of tartar (if using) to stabilize the peaks.
- Whip on medium speed: Beat the mixture on medium speed until it starts to thicken. You’ll notice soft trails forming.
- Increase to high speed: Gradually increase the speed to high and beat until soft peaks form. The cream should be fluffy but still hold its shape when you lift the beaters. Be careful not to overwhip—it can quickly turn into butter!
Color and Texture Variations for a Dreamy Effect
To add a creative touch:
- Subtle pastel swirls: Add a drop of gel food coloring (like baby blue or blush pink) and gently fold it in for a marbled, dreamy effect.
- Edible glitter or luster dust: Sprinkle a pinch of edible glitter for a shimmering cloud-like look.
- Flavor enhancers: You can stir in a teaspoon of almond or coconut extract for an extra depth of flavor.
With your frosting whipped to perfection, you’re ready to assemble the layers and add those cloud-like swirls!
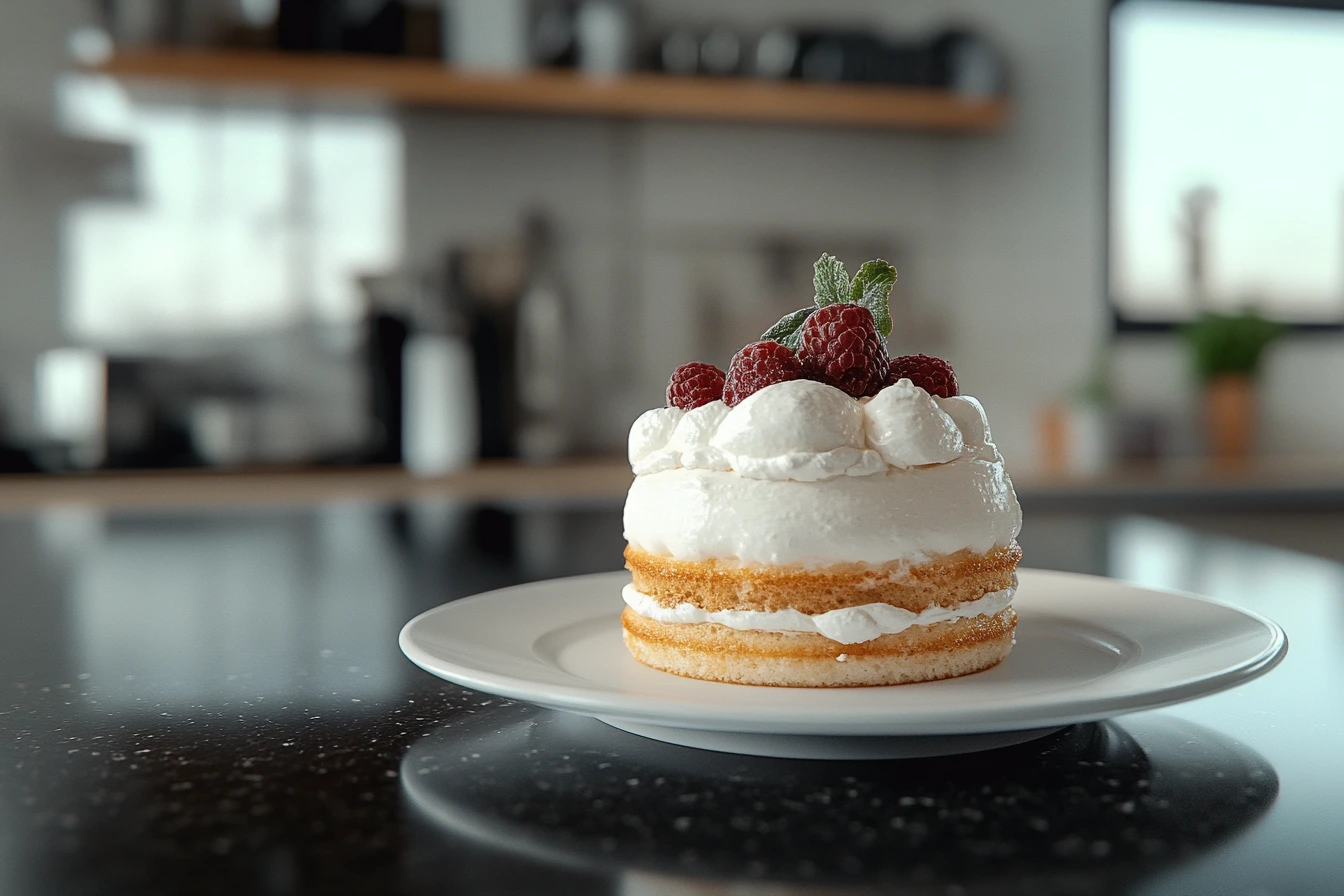
Assembling and Decorating the Cloud Cake
Now that you have a soft, fluffy cake base and perfectly whipped frosting, it’s time to bring everything together. This is the fun part—where your cake transforms into a visual masterpiece! Let’s layer, frost, and decorate your cloud cake step-by-step.
Layering with Cloud-like Swirls
- Place the first cake layer: Center the first cake layer on your cake stand or serving plate.
- Add a generous dollop of frosting: Spoon about 1 cup of frosting onto the layer and spread it evenly using an offset spatula. Keep the layer thick enough to resemble a puffy cloud but smooth enough for balance.
- Stack the second layer: Carefully place the second cake layer on top of the frosted one. Press down lightly to secure it but avoid squeezing the frosting out the sides.
Creating Puffy Cloud Decorations
- Frost the sides and top: Spread the remaining frosting over the top and around the sides of the cake.
- Add cloud-like swirls: Use a piping bag fitted with a round or star tip to pipe fluffy swirls on the top and sides of the cake, creating a dreamy, layered cloud effect. For a whimsical touch, alternate swirl sizes to resemble natural clouds.
- Incorporate mini clouds: Add small meringue puffs or marshmallow pieces around the cake as extra “mini clouds.”
Finishing Touches: Edible Glitter, Meringue, and More
- Edible glitter: Sprinkle a light dusting of edible glitter or luster dust to give your cloud cake a magical shimmer.
- Sugar pearls: Add small, white sugar pearls to mimic raindrops or stars in the sky.
- Fondant details (optional): If you want more control over the design, use white fondant to shape small, soft cloud cutouts and press them gently into the frosting.
Alternative Techniques and Creative Ideas
If you want to take your cloud cake to the next level, there are plenty of ways to get creative. Whether you’re aiming for a different flavor profile, a smoother finish, or themed decorations, these techniques and ideas will add that extra flair to your dessert.
Incorporating Flavors that Match the Visual Appeal
A classic cloud cake has a vanilla base, but you can experiment with flavors that enhance its dreamy appearance:
- Coconut cloud cake: Add coconut extract to the batter and frosting, and sprinkle shredded coconut for a snow-like effect.
- Lemon-vanilla cloud cake: Add lemon zest and a touch of lemon juice to the batter for a bright, citrusy twist.
- Strawberry cream cloud cake: Swirl pureed strawberries into the whipped cream for a soft, pink hue and fruity flavor.
Using Fondant Clouds for a Smoother Look
If you prefer a more polished look, fondant can help create smooth, seamless clouds:
- Roll out white fondant until it’s about ⅛ inch thick.
- Use a round cutter to create small fondant circles.
- Layer and press the fondant shapes onto the frosting, overlapping them to resemble billowy clouds.
Fondant can also be shaped into raindrops, stars, or even small figures for themed cakes, making it perfect for celebrations like baby showers or birthdays.
DIY Cloud Cake for Themed Occasions
A cloud cake can be the centerpiece of a themed event. Here are some fun ideas:
- Rainbow cloud cake: Add rainbow-colored layers to the cake or decorate the top with colorful fondant rainbows.
- Sunset cloud cake: Use orange, pink, and purple swirls of frosting to create a sunset-inspired effect.
- Galaxy cloud cake: Add edible stars and navy-blue frosting swirls for a cosmic look.
With these creative ideas, you can make a cake that’s not only beautiful but also personal and unforgettable.
FAQs Section
Baking a cloud cake can feel like a delicate art, but with some insider knowledge, you’ll be able to troubleshoot common issues and customize your creation with ease. Here are some frequently asked questions to guide you through the process.
What’s the Best Frosting to Use for a Cloud Cake?
The best frosting for a cloud cake is whipped cream frosting due to its airy, soft peaks that resemble clouds. However, for warmer environments or longer display times, Swiss meringue buttercream or stabilized whipped cream is recommended because it holds up better without melting.
How Do You Keep the Cake from Deflating?
To avoid deflating, ensure that:
- You don’t overmix the batter—mix only until the ingredients are combined.
- The cake layers are fully cooled before frosting.
- You handle the cake gently when assembling the layers to prevent compression.
If you’re baking at a high altitude, consider adjusting the leavening agent slightly.
Can I Make a Vegan Cloud Cake?
Yes! You can make a vegan cloud cake by substituting:
- Plant-based milk (such as almond or oat milk) for whole milk.
- Vegan butter or coconut oil for regular butter.
- Aquafaba (chickpea water) as a replacement for egg whites—it whips up similarly to meringue.
For the frosting, use coconut cream or a vegan whipped topping.
What Decorations Work Best for a Cloud Cake?
Edible decorations such as meringue puffs, sugar pearls, marshmallows, and edible glitter work best for achieving a whimsical, cloud-like appearance. Avoid heavy decorations, as they can weigh down the frosting and cause it to collapse.
How Long Does a Cloud Cake Last?
A cloud cake typically lasts 3–4 days when stored properly. Keep it refrigerated in an airtight container to maintain the frosting’s texture. If the cake has been decorated with fresh fruit, consume it within 1–2 days to avoid sogginess.
Can I Freeze the Cake Layers in Advance?
Yes, you can freeze the cake layers! Wrap each layer tightly in plastic wrap, followed by a layer of aluminum foil. When you’re ready to use them, let them thaw at room temperature before frosting.
Conclusion and Final Tips
Congratulations! You’ve now learned how to make a cake look like a fluffy cloud—from preparing the perfect airy base to decorating with dreamy swirls of frosting. With a bit of patience and creativity, your cloud cake will not only look stunning but also taste heavenly.
Final Tips for Cloud Cake Success
- Avoid overwhipping: Whether it’s the batter or frosting, overmixing can lead to dense cake layers or grainy frosting. Stop whipping as soon as you achieve soft peaks.
- Keep everything cool: For the best results, make sure your ingredients (like heavy cream) and tools are cold before you begin whipping.
- Add texture with decorations: Meringue puffs, marshmallows, and sugar sprinkles add a fun, textural contrast to the light frosting.
- Refrigerate between steps: When layering and frosting, pop the cake in the fridge for 10–15 minutes to help the frosting set and avoid sliding.
- Have fun with colors: Don’t be afraid to experiment with soft pastel food coloring to create ombré or marbled cloud effects.
By following this guide, your cloud cake will be the highlight of any event, whether it’s a birthday celebration, baby shower, or just a treat-yourself dessert. So, roll up your sleeves and get ready to impress everyone with your baking skills!
Nutritional Information (per 100g)
Here’s an approximate breakdown of the nutritional content of your cloud cake:
| Nutrient | Amount (per 100g) |
|---|---|
| Calories | 320 kcal |
| Protein | 4 g |
| Carbohydrates | 45 g |
| Sugar | 30 g |
| Fat | 15 g |
| Saturated Fat | 9 g |
| Fiber | 1 g |
| Sodium | 120 mg |
Enjoy your dreamy cloud cake creation, and don’t forget to snap a photo before everyone digs in!
3 thoughts on “How to Make a Cake Look Like a Cloud: Fluffy, Dreamy, and Delicious”