Making snow ice at home is not only fun but also a creative way to enjoy a refreshing dessert that can be tailored to your preferences. This fluffy, melt-in-your-mouth treat has its roots in Asian cuisine, particularly Taiwan, and has gained popularity worldwide for its unique texture and endless topping possibilities. The best part? You don’t need professional skills or fancy equipment to make it! With the right ingredients and a few tools, you can create this delightful dessert in the comfort of your kitchen.
This guide will walk you through everything—from understanding what snow ice is, to preparing the base, freezing it correctly, and even adding flavors and toppings that will make your homemade creation stand out. Whether you’re hosting a party, cooling off on a hot day, or simply indulging in your sweet tooth, learning how to make snow ice at home will be an experience worth savoring.
What Is Snow Ice?
Understanding Snow Ice
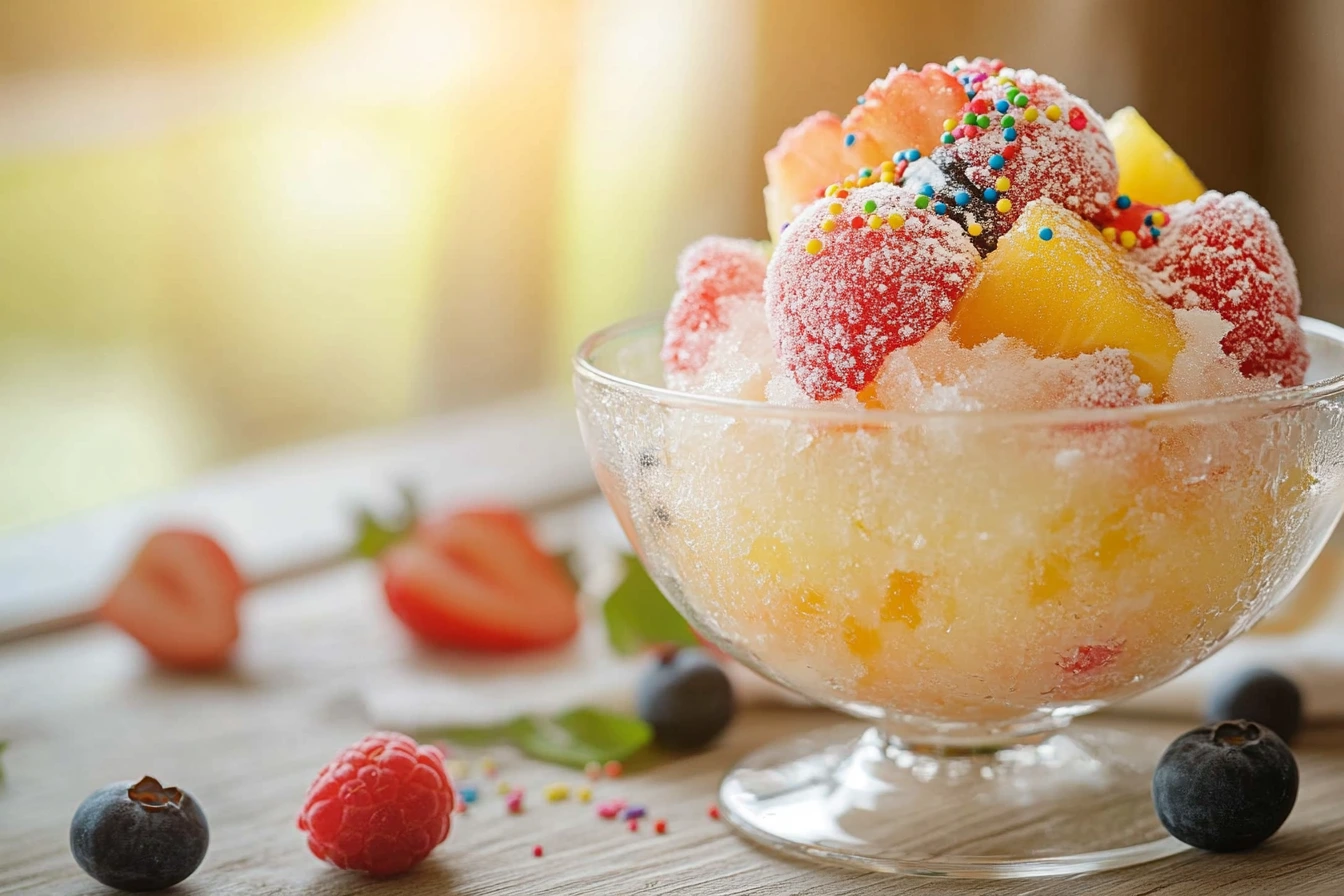
Snow ice is a deliciously fluffy dessert that’s somewhere between traditional shaved ice and ice cream. Unlike regular shaved ice, which uses plain ice blocks, snow ice involves freezing a flavored base made from ingredients like milk, cream, and sugar. Once frozen, the base is shaved into thin, delicate layers that practically dissolve in your mouth. It’s smooth, creamy, and delightfully light.
The beauty of snow ice lies in its texture—it’s soft and airy, almost like eating a cloud. It’s commonly served with toppings such as fresh fruits, sweet syrups, condensed milk, and even cookie crumbles. This combination of lightness and rich flavors makes it a popular choice for dessert lovers around the world.
Origin of Snow Ice
The origins of snow ice can be traced back to Taiwan, where it is famously known as “Baobing” or shaved ice. In the sweltering heat of summer, this dessert became a favorite way to cool off, thanks to its icy texture and customizable flavors. Over time, Taiwanese snow ice evolved into the version we know today, with creamy bases and artistic presentations.
It’s not just a dessert but also a cultural icon in many Asian countries. With its recent rise in global popularity, you’ll now find snow ice shops in cities worldwide, but making it at home offers unmatched freshness and creativity.
Why Make Snow Ice at Home?
Store-bought snow ice may be convenient, but homemade snow ice takes the experience to a whole new level. Here are a few reasons why making it at home is worth the effort:
- Healthier options: You can control the ingredients and adjust the sugar content to suit your dietary needs.
- Customizable flavors: Experiment with endless flavor combinations, from classic vanilla to exotic matcha or mango.
- Cost-effective: Preparing snow ice at home is often cheaper than buying it from specialty dessert shops.
- Fun activity: Making snow ice is an enjoyable project for families, friends, or even solo dessert enthusiasts!
So, while grabbing a cup of snow ice from a store might be tempting, creating your own version at home ensures it’s healthier, fresher, and uniquely yours. It’s a win-win!
Tools and Ingredients Needed
Essential Equipment for Snow Ice
To make snow ice at home, you don’t need a high-tech professional setup, but having the right tools can make the process much smoother. Here’s what you’ll need:
- Snow Ice Machine or Shaver: If you’re serious about snow ice, investing in a snow ice machine is a game-changer. These machines shave frozen blocks into fine, fluffy layers. However, if you’re just starting out, a simple hand-cranked ice shaver or even a sturdy grater can work as an alternative.
- Mixing Bowls: You’ll need mixing bowls to prepare your flavored base. Stainless steel bowls are particularly useful since they help keep the mixture cold.
- Freezer-Safe Containers: Choose containers that are flat and shallow for freezing your base evenly. Silicone molds or metal pans are ideal because they allow for easy release.
- Spatula or Whisk: Essential for blending ingredients into a smooth, lump-free mixture.
- Toppings Station: While not mandatory, setting up a toppings station with small bowls or jars for fruits, syrups, and other add-ons can make serving snow ice more fun.
Even if you don’t have a snow ice machine, don’t sweat it! You can still achieve a light, fluffy texture by freezing the base in thin layers and shaving it by hand. Sure, it might take a bit more elbow grease, but the results will be worth it.
Key Ingredients
Now, let’s talk about what goes into creating that irresistible fluffy ice dessert. The best thing about snow ice is its flexibility—you can use simple, readily available ingredients to get started. Here’s what you’ll need:
- Milk or Cream: The foundation of your snow ice base. Whole milk or heavy cream gives the dessert its signature creamy texture. For a lighter option, you can use low-fat or skim milk.
- Sugar: Granulated sugar works best to sweeten the base, but you can substitute it with honey or maple syrup for a natural touch.
- Flavorings: Vanilla extract, matcha powder, cocoa, or fruit purees are popular choices. For a tropical twist, try adding mango, coconut, or pineapple flavors.
- Toppings: The sky’s the limit here! Fresh fruits like strawberries, bananas, or kiwis are crowd favorites. Other options include syrups, condensed milk, chocolate chips, sprinkles, and even crushed cookies.
Alternative Ingredients for Dietary Needs
Not everyone can enjoy traditional snow ice, but that doesn’t mean they have to miss out! Here are some substitutions to cater to various dietary restrictions:
- Vegan or Dairy-Free Options: Use coconut milk, almond milk, or soy milk instead of regular milk. They’re rich, flavorful, and create a base that’s just as creamy.
- Low-Sugar Alternatives: For a healthier take, swap out regular sugar for natural sweeteners like stevia, monk fruit, or agave syrup. These work well for anyone watching their sugar intake.
- Gluten-Free Add-Ons: If you’re adding toppings, make sure to choose gluten-free options like fresh fruits or gluten-free cookies.
These ingredient swaps ensure everyone can enjoy snow ice without worry. Plus, experimenting with alternatives often leads to creative and unique flavors!
Pro Tips for Ingredients
- Always use chilled milk or cream for the base—it makes blending easier and speeds up the freezing process.
- Avoid overloading the base with flavorings, as it can affect the freezing consistency. A little goes a long way.
- Pre-freeze your toppings (like fruits or syrups) for an extra cooling effect when served.
Having the right ingredients and tools is half the battle won. Once you’ve gathered everything, you’re ready to dive into the fun part—making the snow ice itself!
Step-by-Step Guide to Making Snow Ice
Now that you’ve got your tools and ingredients ready, it’s time to roll up your sleeves and bring that homemade snow ice dream to life. Follow this step-by-step guide to create a light, fluffy dessert that will leave everyone asking for seconds.
Preparing the Base
The base is the heart of your snow ice, so getting it right is essential. Here’s how you can make a smooth and flavorful base:
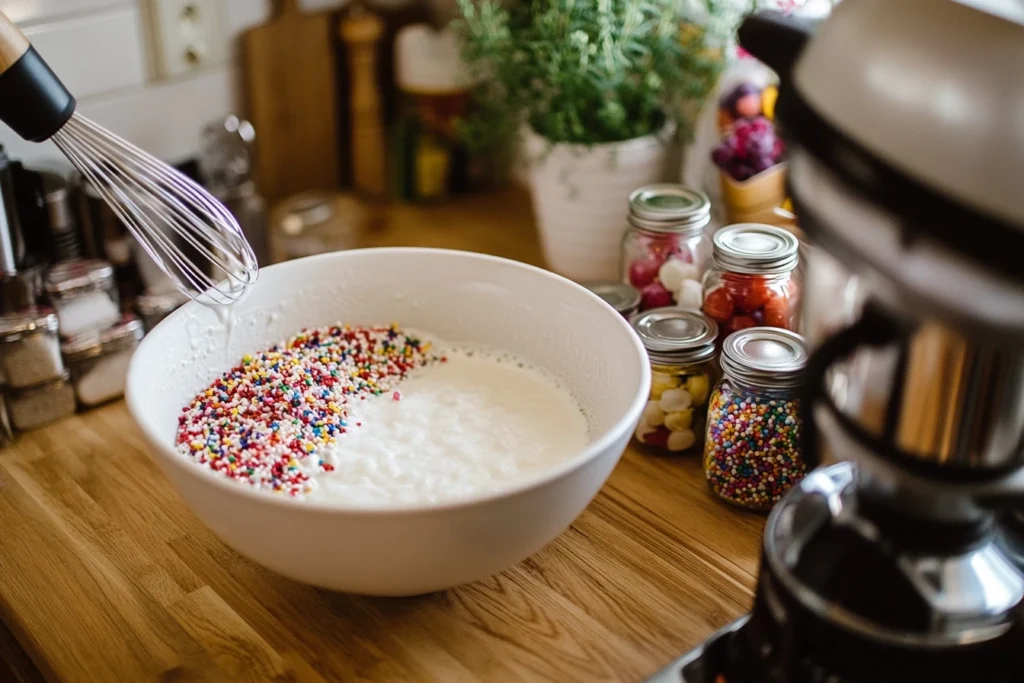
- Mix the Ingredients:
Combine milk or cream (about 2 cups), sugar (¼ cup), and your chosen flavoring (like vanilla extract, matcha powder, or fruit puree) in a mixing bowl. Use a whisk or spatula to stir until the sugar is fully dissolved. If you’re using fruit puree, ensure it’s well-blended for a consistent texture. - Taste and Adjust:
Before freezing, taste the mixture to ensure the sweetness and flavor are just right. You can add more sugar or flavoring if needed, but don’t go overboard, as the flavors intensify once frozen. - Strain for Smoothness:
For an ultra-smooth texture, strain the mixture through a fine mesh sieve to remove any lumps or unblended bits. - Pour into Containers:
Transfer the base into freezer-safe containers. Spread the mixture evenly to avoid air pockets. Shallow containers or molds work best, as they freeze faster and more uniformly.
Freezing the Mixture
Freezing your base is where the magic begins. Follow these tips to ensure it freezes to the perfect consistency:
- Chill First:
Place the containers in the fridge for about 30 minutes before transferring them to the freezer. This step helps the mixture cool evenly and reduces ice crystal formation. - Freeze Flat:
Lay the containers flat in your freezer to ensure the base freezes uniformly. It usually takes 6–8 hours to freeze completely. - Check Consistency:
Once frozen, the base should feel solid but not rock-hard. If it’s too hard, let it sit at room temperature for 5–10 minutes before shaving.
Shaving the Ice
This is where your snow ice transforms from a frozen block into the delicate, cloud-like dessert we all love. If you have a snow ice machine, the process is straightforward. However, you can also achieve great results with manual methods.
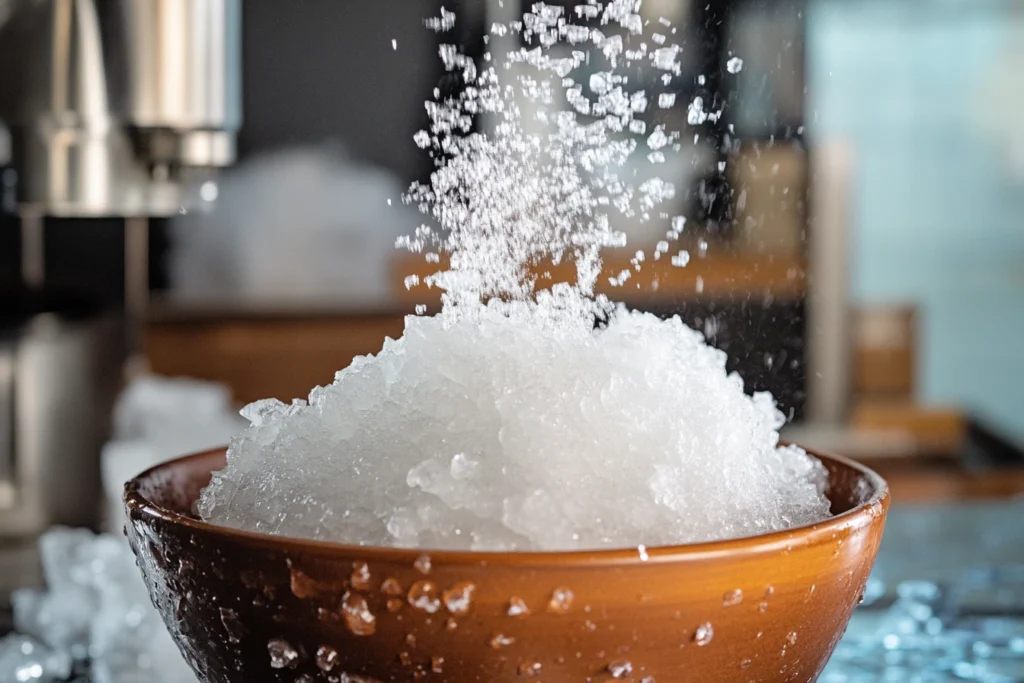
- Using a Snow Ice Machine:
Remove the frozen base from the container and place it into the machine as instructed. Turn it on, and watch as fluffy, paper-thin layers of snow ice fall into your serving bowl. Adjust the thickness settings if your machine has them for the best results. - Manual Shaving Techniques:
If you don’t have a machine, don’t worry—you can still get creative. Use a sturdy grater or sharp knife to shave thin layers off the frozen base. Work quickly to prevent it from melting, and keep the block in the freezer between shavings to maintain its texture. - Tips for Fluffy Results:
- Make sure the base isn’t too hard or too soft before shaving.
- If the shavings stick together, your base may need more time in the freezer.
Adding Flavors and Toppings
This is where your snow ice truly shines! Elevate your creation with creative toppings and bold flavors. Here’s how:
- Layering Flavors:
Start by drizzling a syrup or condensed milk over the shaved ice. You can stick to classic flavors like chocolate or caramel or try something exotic like passionfruit or taro syrup. - Adding Toppings:
Top the shaved ice with fresh fruits, crushed cookies, or candy. If you want a healthier option, add chia seeds, granola, or unsweetened coconut flakes. - Finishing Touches:
For that professional touch, garnish with a sprig of mint, a sprinkle of powdered sugar, or a drizzle of chocolate sauce. Presentation makes a big difference!
Pro Tips for Perfect Snow Ice
- Always work quickly during the shaving and topping process to prevent the ice from melting.
- Freeze small batches of the base if you’re planning to make multiple flavors—it’s easier to manage and avoids wasting ingredients.
- Use chilled bowls or plates to serve the snow ice to keep it cool for longer.
Congratulations! You’ve just mastered the art of making fluffy snow ice from scratch. Whether it’s for a casual treat or a show-stopping dessert at a party, your creation is guaranteed to impress.
Tips for Perfect Snow Ice
Mastering the art of making snow ice at home may take a bit of practice, but with the right tips and tricks, you can create a flawless dessert every time. Whether you’re troubleshooting icy textures or experimenting with flavors, these tips will help you avoid common pitfalls and ensure your snow ice at home turns out light, fluffy, and irresistibly delicious.
Common Mistakes and How to Avoid Them
Even the most enthusiastic home cooks can run into challenges while making snow ice at home. Here are some common issues and ways to solve them:
- Over-Freezing the Base
If your base is rock-hard, it becomes difficult to shave, and you might end up with chunky pieces instead of thin, delicate layers.
Solution: Allow the frozen base to thaw slightly at room temperature for 5–10 minutes before shaving. You can also freeze it in thinner layers for faster shaving. - Under-Freezing the Base
A base that hasn’t been frozen long enough may be too soft to hold its shape when shaved.
Solution: Make sure the base is frozen for at least 6–8 hours, or overnight if possible. Double-check that your freezer is set to the correct temperature (around -18°C or 0°F). - Ice Crystals in the Base
Large ice crystals can ruin the smooth, fluffy texture of snow ice.
Solution: Stir the base thoroughly before freezing to ensure all ingredients are evenly mixed. Straining the mixture helps remove lumps, which can cause uneven freezing. - Flavor Overload
Adding too much flavoring, like syrup or fruit puree, can affect the freezing process and create a dense base.
Solution: Stick to the recommended measurements for flavorings, and remember that less is often more when it comes to achieving balance.
Storage and Preservation
Once you’ve made your snow ice at home, it’s best to enjoy it immediately. However, if you’ve prepared extra base or toppings, here’s how to store them:
- Storing the Base
- Keep any unused base in an airtight, freezer-safe container to prevent freezer burn.
- Use it within 1–2 weeks for the best texture and flavor.
- Preserving the Toppings
- Store syrups and sauces in sealed jars in the refrigerator. They’ll stay fresh for weeks, depending on their ingredients.
- For fruits, freeze them in airtight bags to maintain freshness.
- Leftover Shaved Ice
Unfortunately, once the snow ice has been shaved, it can’t be stored well without losing its fluffy texture. If you have leftovers, consider blending them into a smoothie or milkshake to avoid waste!
Pro Tips for Consistency and Flavor
- Chill Everything: From your mixing bowls to your toppings, keeping everything cold will help maintain the ideal temperature for your snow ice at home.
- Experiment in Small Batches: If you’re trying out new flavors or techniques, start with smaller portions to minimize waste in case something goes wrong.
- Layer Flavors Strategically: To achieve the best taste, alternate between layers of shaved ice and toppings. This way, every bite is packed with flavor.
With these tips, you’ll avoid the most common mistakes and enjoy smooth, melt-in-your-mouth snow ice every time. Remember, practice makes perfect, and every batch you make is a step closer to becoming a snow ice expert!
Serving and Presentation Ideas
The joy of making snow ice at home doesn’t end with the preparation—it’s the way you serve and present it that turns this treat into an unforgettable experience. From colorful toppings to creative themes, the possibilities for styling your snow ice are endless. Here’s how to make your dessert not only taste amazing but also look stunning!
Creative Ways to Serve Snow Ice
Your snow ice can be served in a variety of ways, depending on the occasion or the vibe you want to create. Here are some ideas to get you started:
- Traditional Bowls
A classic option, bowls are perfect for holding layers of shaved ice, syrup, and toppings. Use colorful ceramic or glass bowls for a stylish presentation. - Dessert Cups or Glasses
For an elegant twist, serve your snow ice in transparent dessert cups or wine glasses. The layers of ice and toppings create a beautiful visual appeal. - Edible Cones or Cups
Want something fun? Serve your snow ice in edible waffle cones or chocolate cups. It’s a great option for kids (and adults with a sweet tooth!). - Family-Style Platters
For group gatherings, spread your snow ice on a chilled platter and let everyone add their own toppings. It’s interactive, social, and perfect for parties.
Garnishing Like a Pro
Garnishing your snow ice is where you can let your creativity shine. The right garnish can take your presentation to the next level and make it look as good as it tastes.
- Fresh Fruits
Add vibrant color with fresh fruits like strawberries, kiwis, mangoes, or blueberries. Slice them thinly or use small pieces to make them easy to eat. - Syrups and Sauces
Drizzle chocolate sauce, caramel, condensed milk, or fruity syrups over the top. Use a squeeze bottle for precision and a professional finish. - Edible Flowers
For a sophisticated touch, sprinkle edible flowers like pansies, violets, or lavender on top of your snow ice. They add a unique pop of color. - Crunchy Add-Ons
Crushed cookies, cereal, or nuts provide a delightful contrast to the soft texture of the snow ice. Oreo crumbs, granola, or toasted coconut flakes are great options. - Dustings and Sprinkles
A light dusting of powdered sugar, cocoa powder, or matcha powder can add elegance, while colorful sprinkles make it fun and festive.
Seasonal and Party Themes
Take your snow ice presentations to the next level by aligning them with themes for different seasons, holidays, or events.
- Summer Vibes
Use tropical flavors like coconut and mango, and serve your snow ice in hollowed-out pineapples or coconuts. Garnish with mini paper umbrellas for a beachy feel. - Winter Wonderland
Stick to a white and blue theme with vanilla or coconut-flavored snow ice, topped with silver sprinkles and a drizzle of white chocolate. - Festive Holidays
For Christmas, create red and green layers using strawberry and matcha flavors. Add candy canes as garnishes. For Halloween, use orange syrups and crushed chocolate cookies to create a spooky effect. - Birthdays and Celebrations
Use multi-colored sprinkles, edible glitter, and personalized flags or toppers to make the snow ice special for someone’s big day.
Pro Tips for Stunning Presentations
- Layer with Care: If you’re adding multiple toppings, layer them thoughtfully so each bite has a balance of flavors and textures.
- Chill Your Serving Ware: Place bowls or glasses in the freezer for a few minutes before serving to keep your snow ice colder for longer.
- Play with Height and Colors: Use tall glasses or stack your snow ice high for a dramatic effect. Bright, contrasting colors in your toppings will make the dessert pop visually.
Serving and presenting your snow ice is as much an art as it is a science. A well-presented dessert doesn’t just taste better—it creates a memorable experience that your guests will talk about long after the last bite.
Frequently Asked Questions About How to Make Snow Ice at Home
When it comes to making snow ice at home, a few questions often pop up, especially for beginners. From troubleshooting issues to exploring unique ideas, this FAQ section will cover the most common concerns and curiosities. Let’s dive right in!
What is the best machine for making snow ice at home?
The best snow ice machine depends on your budget and frequency of use. For beginners, affordable options like handheld ice shavers or small countertop machines work well. However, if you plan to make snow ice at home regularly, investing in a high-quality electric snow ice machine, like a model with adjustable thickness settings, is worth it.
Can I make snow ice without a machine?
Absolutely! If you don’t have a snow ice machine, you can still create fluffy snow ice using a sturdy grater, a sharp knife, or even a food processor. Here’s how:
- Freeze your base in a flat, shallow container.
- Once frozen, use the grater to shave off thin layers or scrape the surface with a knife.
- Alternatively, chop the base into smaller pieces and pulse it gently in a food processor.
While the texture may not be as fine as machine-shaved snow ice, the flavor and fun remain the same!
How do I prevent my snow ice from being too hard?
If your snow ice base feels too hard and difficult to shave, it’s likely over-frozen. Here are some quick fixes:
- Let the frozen base sit at room temperature for 5–10 minutes before shaving.
- Freeze the base in thin, shallow layers to make it easier to handle.
- Avoid adding too much sugar or liquid flavoring to the base, as they can affect the freezing process and texture.
What are some unique snow ice flavors I can try?
One of the joys of making snow ice at home is experimenting with creative flavors. Here are a few ideas to inspire you:
- Matcha Madness: Use matcha powder and sweetened condensed milk for a Japanese-inspired treat.
- Tropical Delight: Blend coconut milk with mango or pineapple puree for a refreshing tropical vibe.
- Chocolate Lover’s Dream: Mix cocoa powder and chocolate syrup into your base, then top with chocolate chips and whipped cream.
- Berry Bliss: Use pureed strawberries, raspberries, or blueberries for a fruity twist.
- Taro Heaven: Add taro powder or paste to create a creamy, nutty flavor popular in Asian desserts.
Feel free to experiment with combinations—there’s no wrong way to customize your snow ice at home!
Is snow ice suitable for vegans?
Yes! Snow ice can easily be made vegan by substituting traditional dairy ingredients with plant-based alternatives. Here are some tips:
- Use coconut milk, almond milk, soy milk, or oat milk as the base.
- Sweeten with agave syrup, maple syrup, or coconut sugar instead of honey.
- Pair with vegan-friendly toppings like fresh fruits, crushed nuts, or dark chocolate.
This way, everyone can enjoy snow ice at home, no matter their dietary preferences!
How long can I store homemade snow ice?
While snow ice is best enjoyed fresh, you can store the frozen base for later use. Follow these tips for optimal storage:
- Keep the base in airtight, freezer-safe containers to prevent freezer burn.
- Use the base within 1–2 weeks to maintain its flavor and texture.
- Once shaved, snow ice cannot be stored, as it will melt quickly and lose its fluffy consistency. If you have leftovers, consider turning them into a smoothie or milkshake.
4 thoughts on “How to Make Snow Ice at Home: A Complete Step-by-Step Guide”